
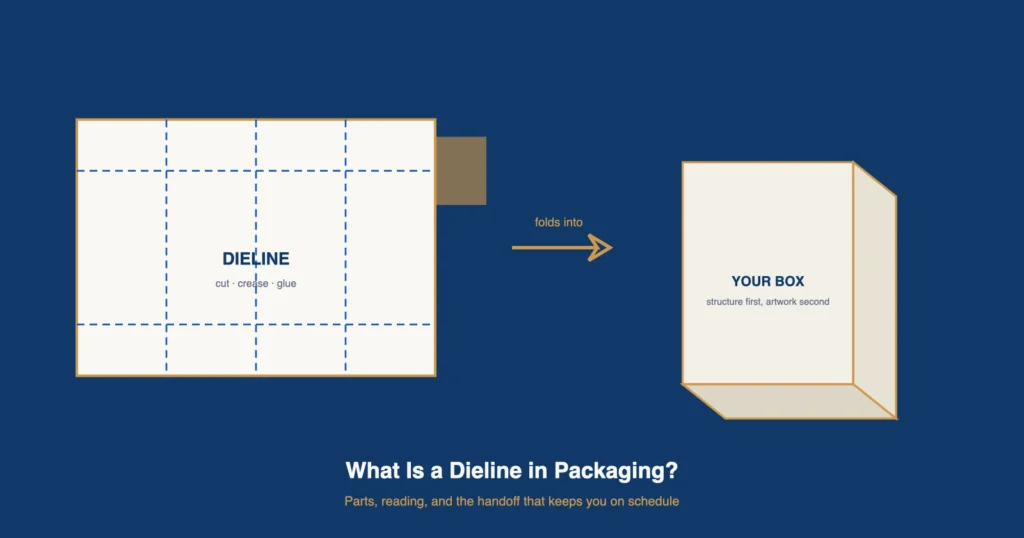
A dieline is the flat, printed-and-folded template of your packaging: one drawing that shows where the board is cut, where it creases, where the glue sits, and how much bleed the artwork needs before the sheet reaches the die-cutting machine.
From the factory side, the dieline is the first production instruction we receive. Everything downstream — sample timing, artwork placement, bulk schedule inside a 15–30 working day production window — assumes the dieline was read and approved correctly.
Use this guide to read a dieline with confidence, name every part of it, and avoid the handoff mistakes that quietly cost weeks.
What Is a Dieline?
A dieline is a two-dimensional construction drawing of your packaging before it is folded. It shows the flat sheet exactly as the cutting die and creasing rules will produce it: the outline that gets cut, the lines that get creased for folding, the panels that become walls of the box, and the tabs that hold it together.
Three separate line systems live on one dieline:
- خطوط القص — the knife edges. Everything outside them is scrap.
- Crease lines (fold lines) — where the board bends. A crease is not a cut; it is a controlled collapse of the board’s internal structure.
- Bleed and safety zones — extra printed area beyond the cut edge, and a protected margin inside it where no critical text or logo may sit.
One dieline is not one drawing for all purposes. The same box has a structural dieline for the die-cutter, an artwork layer positioned on that dieline, and a finish layer for lamination, foil, or coating decisions. Buyers who treat these as one file are the ones who redraw artwork twice.
If you remember one thing: the dieline defines geometry, not graphics. It answers “what shape is this package and how does it fold,” and only after that does it answer “what is printed on it.”
Buyers juggle four related artifacts that are often confused. They are not interchangeable, and knowing which one you are approving prevents most handoff arguments:
| Artifact | What it is | Who approves it | What it decides |
|---|---|---|---|
| خط القطع | The structural flat template — cut, crease, bleed, panels | Buyer + production (geometry is a shared decision) | Dimensions, structure, fold behavior, board area |
| العمل الفني | The printed content positioned on the dieline | Buyer (brand owns it) | Graphics, text, barcodes, finish placement |
| Mockup | A plain-paper folded model of the dieline | Anyone (it is a communication tool) | Proportion and fold intuition — not print, not material |
| عينة | The real box on real board with real print | Buyer (it is the production acceptance gate) | Fit, print quality, finish, closure — the approval record |
The dieline is the only one of the four that changes what the die tooling cuts. Approve it as geometry, and the other three fall into place in order.
Why Dielines Matter Before Artwork
The dieline comes first because it fixes every dimension the artwork depends on. When structure is locked, the artwork can be placed once, proofed once, and approved once. When artwork happens first, every structural correction — a 3 mm panel change, a tuck reversed, a depth added for a product lip — invalidates the art placement and the proof schedule with it.
The cost shows up in three places:
- Redraw time. Artwork repositioned to a new dieline restarts proofing.
- Sample rounds. A sample built on moved artwork cannot answer the question the buyer asked (“does the design read correctly on the shelf?”), so an extra sample round is consumed answering a structural question.
- Quote assumptions. Board caliper, glue area, and finish coverage are dieline-dependent. Change the dieline after quoting and the quote is a new quote.
This is why on our custom folding cartons page the structure choice comes before print and finish: the structure fixes the dieline that the artwork is laid out on. Lock the structure, then place art — the box style selection logic and the structural sample checks both assume that order.
Next action: before any artwork session, get the dieline approved and dated. Save that version with the artwork proof record.
The Parts of a Dieline
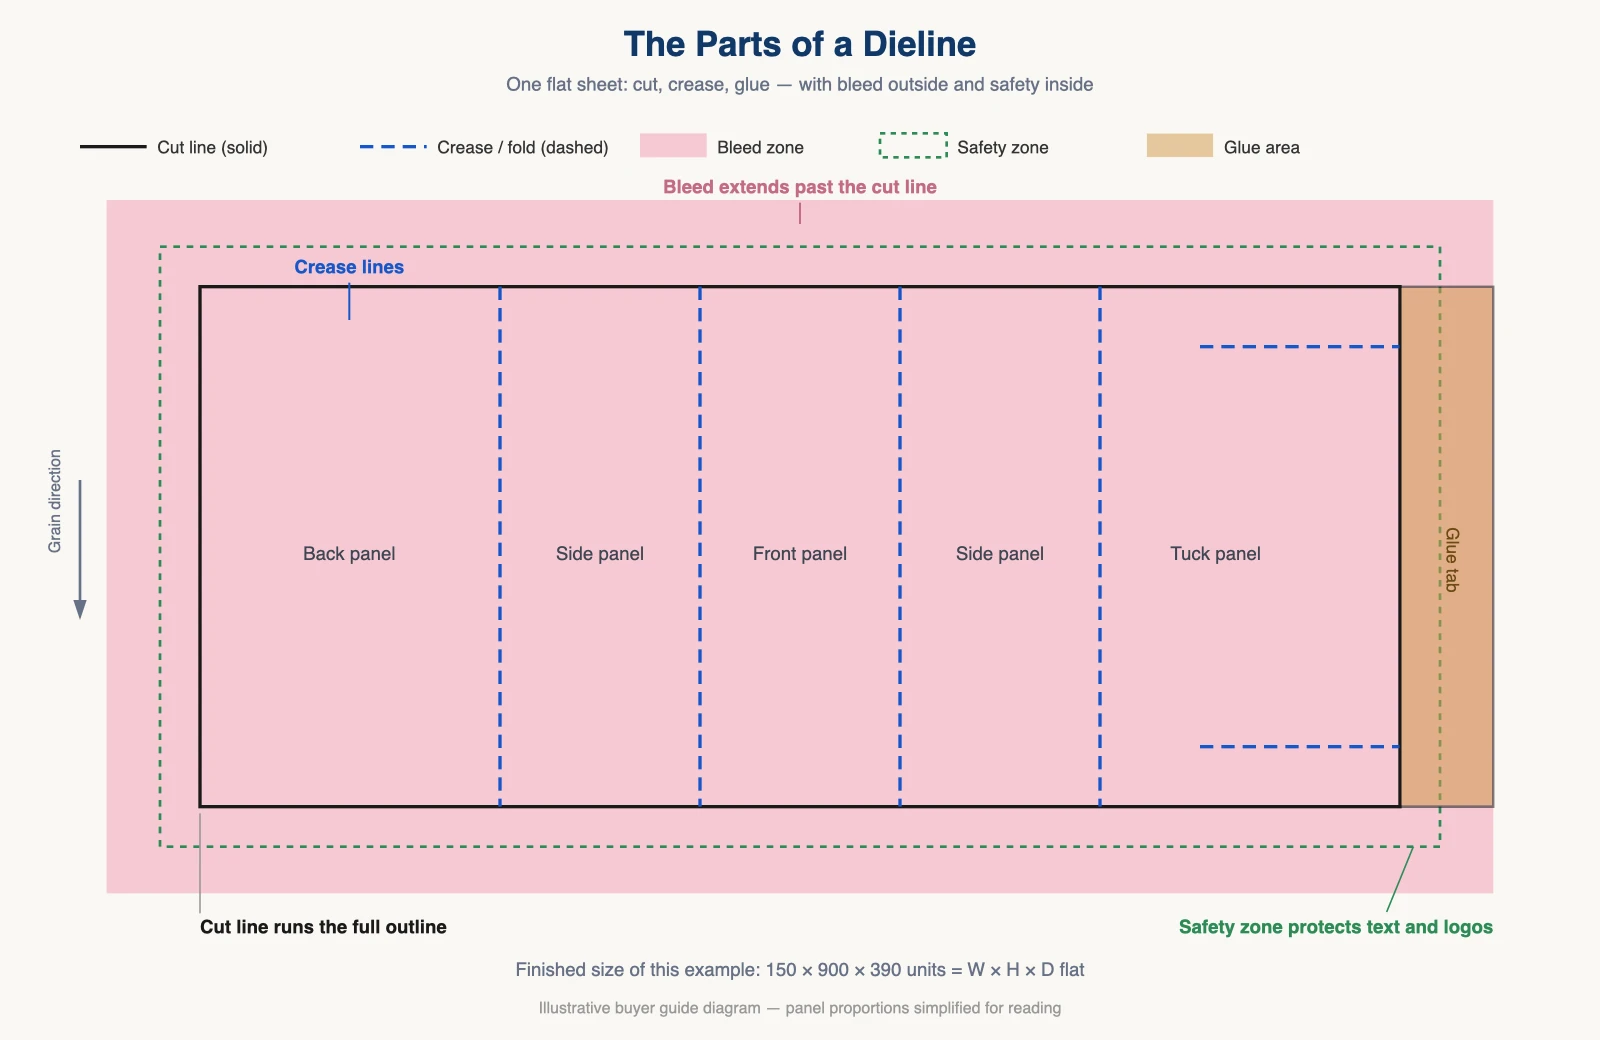
A production dieline has named layers and named zones. Buyers who can name them can check them; buyers who cannot must trust the supplier’s proof read. Here is what sits on the file.
| Part | What it is | ما يتحكم فيه | What to check on the file |
|---|---|---|---|
| Cut line | The outer knife edge of the flat sheet | Final shape of the package and the die tooling | Cut line is a distinct named color/stroke (usually black or red) and is continuous |
| Crease / fold line | Where the board will bend | Panel geometry, folding force, closure action | Creases use a different stroke (often dashed or blue) and never cross a cut line |
| Perforation line | Partial cut for tear-open features | Opening behavior | Perforation density and length are specified, not implied |
| Bleed | Printed area extending past the cut line, typically 3–5 mm | Whether color reaches the trimmed edge | Backgrounds and edge-touching graphics extend into bleed; no white gaps at cut |
| Safety zone (safe area) | Margin inside the cut/crease where critical content is protected | Text, logos, barcodes surviving cut and fold tolerance | Critical elements sit inside the safety zone with stated clearance |
| Glue tab / glue area | The flap that seals the folded carton | Closure strength and whether the glue shows | Glue area width is stated and kept free of varnish/foil that blocks adhesion |
| Panels | The faces and walls between creases | Final box geometry, print placement per face | Panel count and dimensions match the agreed structure (tuck style, depth, width) |
| Grain direction marker | The direction of the board fibers | Fold quality, cracking risk, gluing behavior | Grain arrow is present and matches the fold orientation decision |
Two of these deserve a buyer’s special attention:
Bleed and safety zones are a pair, not a choice. Bleed protects the edge from white slivers when the cut shifts a fraction of a millimeter; the safety zone protects your barcode and logo from the same shift. Artwork that respects bleed but ignores the safety zone ships with logos shaved by the cutter.
The grain direction marker is the most silently consequential line on the file. Board folds cleanly along the grain and resists folding across it. A dieline rotated 90° against the grain can crack on every crease of a coated stock. It is the one “drawing detail” that is a material decision in disguise — and it is exactly the kind of issue the structural design sample checks are built to catch before sampling.
What goes wrong at each part
Every part of a dieline has a signature failure — a specific, repeatable way it goes wrong when it is ignored:
- Cut line failures show up as double cuts (the die cuts where two overlapping lines disagreed) or as an outline that cannot be toolled because the path self-intersects. Ask whether the cut path is a single continuous object.
- Crease failures show up as cracking on coated board or as flaps that spring open. Crease-to-panel width ratios matter; a crease placed at a panel edge folds through the corner instead of the flat.
- Perforation failures show up as tear-off that rips past the score line into the panel graphics.
- Bleed failures are the white sliver at the trimmed edge after cutting tolerance goes against you.
- Safety-zone failures are shaved logos and barcodes bent across folds — cosmetic damage that reads as a quality problem on the retail shelf.
- Glue-tab failures are cartons that pop open in transit because the glue sat on foil or coating.
- Grain failures are the cracks along every crease of a coated box folded against the fiber direction.
The pattern across all seven: each failure is invisible in the artwork and only appears on folded board. That is why the file pass in the next section matters more than any mockup.
Next action: open your dieline file and confirm each row of the table has a visible, named answer. Any row you cannot find is a handoff gap.
Dieline Examples: Three Common Carton Structures
The same product can ship in very different dielines. These three structures cover most folding carton inquiries we see, and their dielines differ in ways that matter for artwork and packing.
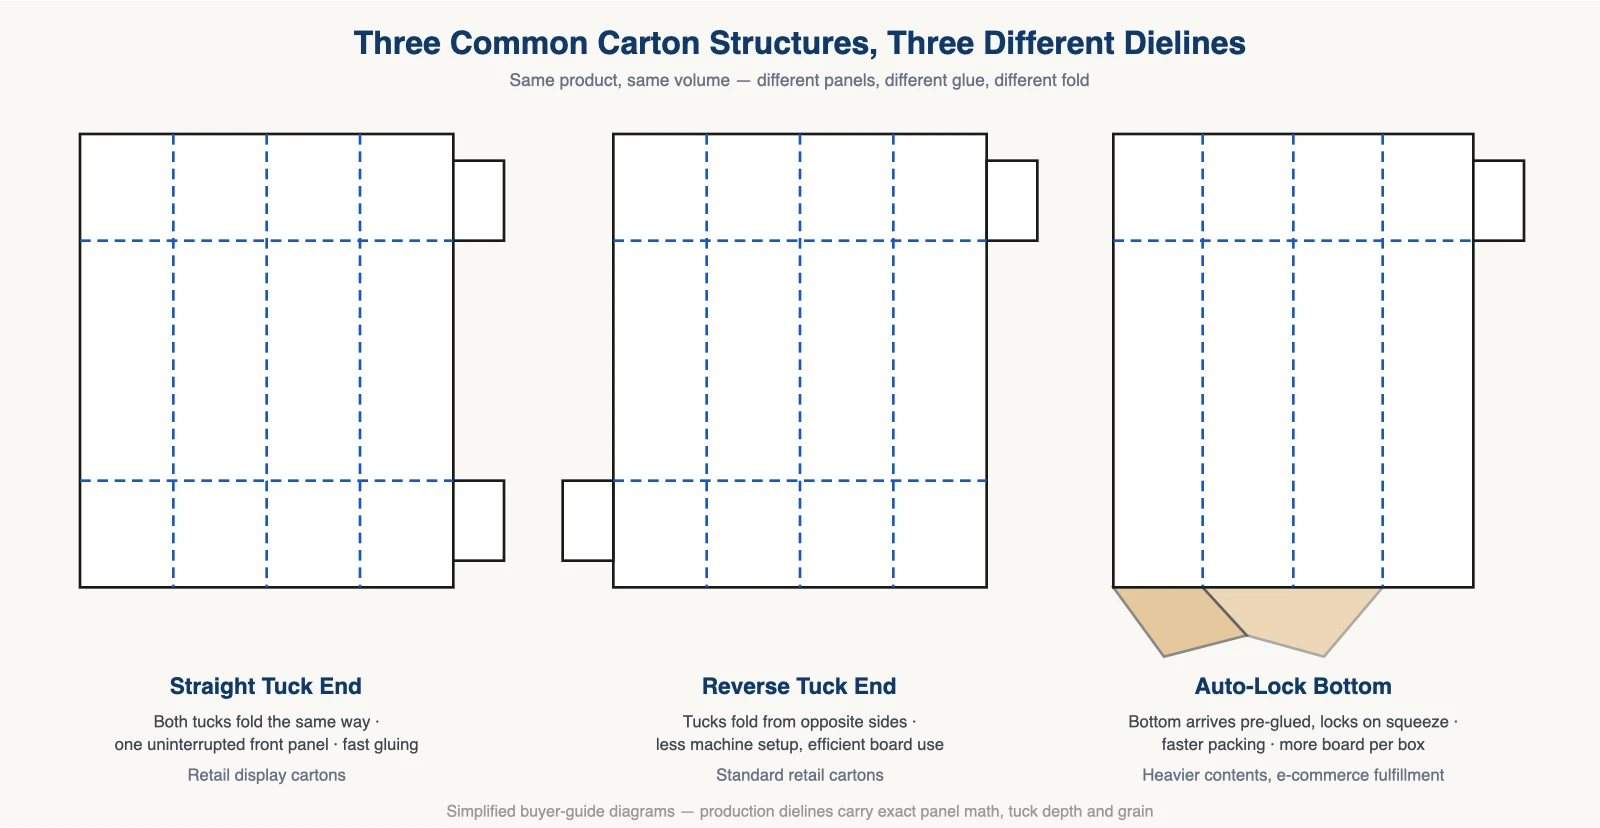
طرف مغلق مستقيم
The top and bottom flaps both tuck from the same direction. The dieline has tuck slots on one side panel, which keeps one full printable face uninterrupted — good for a strong front panel. Assembly is fast on a gluing line.
طرف مغلق معكوس
Top flap tucks from one side, bottom flap from the other. The dieline extends slightly longer at both ends, trading a little board area for faster setup and less machine time. The standard choice for retail cartons where both price per unit and presentation matter.
Auto-lock (crash-lock) bottom
The bottom arrives pre-glued and locks when the box is squeezed open. The dieline carries an extra glued panel with a specific lock geometry — more board, a glue line, and a distinct fold sequence. The trade: slightly higher unit structure cost for much faster packing throughput. Common for heavier contents and e-commerce fulfillment.
What changes between the three dielines is not decoration: panel count, glue tab position, tuck slot geometry, and total flat size all move — and with them, artwork placement and freight-per-carton packing counts. When several suppliers quote “the same” carton, confirm the dielines are actually the same structure before comparing numbers; the folding carton supplier comparison sheet exists for exactly that check.
The dieline differences reach past the shelf into the shipping carton:
- Flat sheet size determines how many blanks fit one corrugated shipping carton — and freight is quoted per carton. An auto-lock bottom adds board at the base; two hundred blanks may need one more master carton than the same count of straight tucks.
- Assembly time scales with fold count and glue. Straight tuck assembles in one motion per end; auto-lock bottoms pop open in a squeeze but need the glue line at production. Packing-line speed is a dieline consequence, not a packing decision.
- Crash-lock trade note: for lighter retail cartons the extra base board can outweigh its benefit; for heavier e-commerce fulfillment the fast-lock bottom usually pays for itself in packing labor. Say which side of that line your product sits on when you request the quote.
Next action: name your structure family (straight tuck, reverse tuck, auto-lock) in the RFQ, so every quote assumes the same dieline — and ask each supplier to state the flat sheet size so packing counts compare on the same basis.
How to Read a Dieline
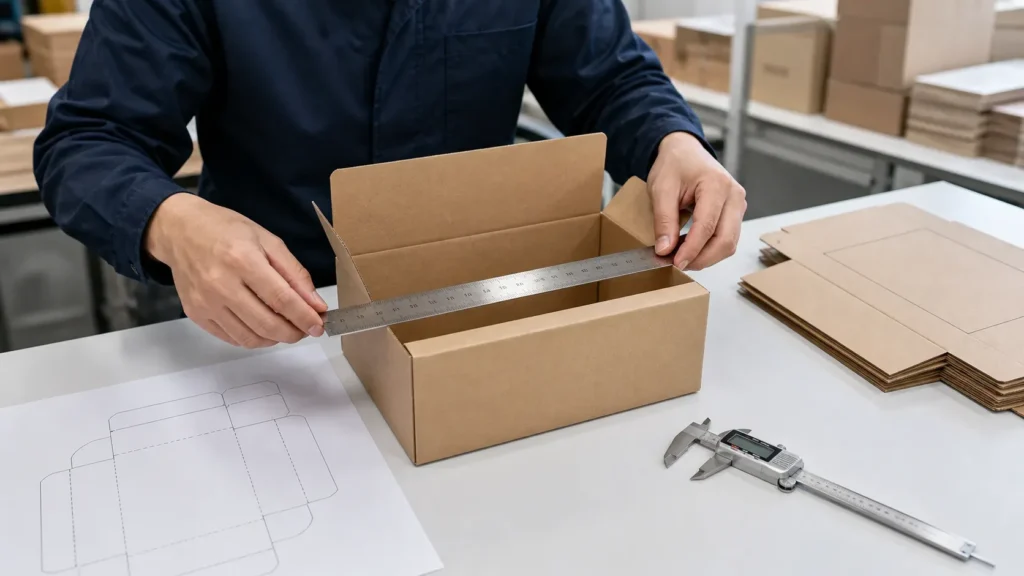
Reading a dieline is a four-step pass. You do not need design software — you need to know what each mark is telling you.
Step 1 — identify the panels. Find the crease lines and count the enclosed panels: the face panels (front, back, sides), the tuck panels, and the glue flap. Walk the flat sheet in your head through one fold sequence: back panel up, side panels in, front panel around, tuck in. If you cannot fold it in your head, ask the supplier for a folded sample or a folding animation before approving.
Step 2 — check the dimension chain. A production dieline states finished dimensions (the box’s outer size, width × depth × height) and shows them consistently along the panel edges. Confirm the three numbers on the dieline match the three numbers in your RFQ — width to depth to height, in the order your supplier uses. Dimension order confusion is the most common buyer-side dieline error; the box dimension reading conventions matter because “same numbers, different order” produces a different box.
Step 3 — verify the marks. Bleed extends past cut. Safety margins keep critical elements clear. The grain arrow points the way the board fibers run. The barcode area, if any, sits flat on a panel that will not cross a crease. Each of these is a named layer or marker — if it is missing from the file, it is missing from production.
Step 4 — read it as the die will. Everything on the cut line gets cut; everything on a crease line folds. Graphics that cross a crease will crack along it on coated stock unless the design intends it. Small text near a fold will distort. Ask one question of the file: “does anything important sit on a fold or too close to a cut?” — and if the answer is yes, move it into the safety zone before the file goes to the die room.
A worked example makes the pass concrete. Take a reverse tuck carton quoted at 90 × 50 × 130 mm (width × depth × height):
- Panels: the flat sheet shows four wall panels (90 + 50 + 90 + 50 mm wide) and two 90 × 50 mm tuck panels at the ends. Walking the fold: back up, sides in, front around, top tuck closes, bottom tuck closes. If your product is 130 mm tall, the wall panels must read 130 mm between creases — measure on the file, not by eye.
- Dimension chain: the finished-size callout should read 90 × 50 × 130 in your supplier’s stated order. If your RFQ said 50 × 90 × 130 (depth first), the numbers match but the box is different — confirm the order, not just the values.
- Marks: bleed extends 3–5 mm past every cut edge; the safety zone holds your logo clear of both the cut and the top tuck crease; the grain arrow runs parallel to the 130 mm creases so the folds bend with the fiber.
- Die view: your barcode sits flat on the front panel, clear of the side creases. Any artwork crossing the top tuck crease will crack there on coated board — intended or not.
Four checks, one sheet, five minutes — and each one targets a failure mode that shows up only after printing, when it costs a sample round instead of a file edit.
Next action: run the four-step pass on your current dieline and list anything you cannot verify. That list is your question set for the supplier.
How to Create or Get Your Dieline
There are two working routes, and the choice depends on what your side can produce and what your supplier confirms.
Route one: your designer draws the dieline. Your designer builds the dieline from the finished dimensions and structure, and the factory reviews it for production feasibility — board caliper against the crease-to-crease spans, glue tab width, grain direction against the fold plan. Hand over: product dimensions with clearance, the structure family, board preference, print and finish notes, and any regulatory label placement. The factory’s confirmation turns a design-file dieline into a production dieline.
Route two: the factory works from your dimensions. You send product size, weight, orientation, clearance, and quantity; the supplier returns a proposed dieline for approval. This route keeps structural responsibility with the party running the die and the gluing line. What comes back for your approval is the dieline, the quote assumptions behind it, and the sample plan.
Both routes converge at the same gate: a dated, approved dieline version before artwork output and before sampling. What differs is who carries the structural drafting work — confirm which route your quotation assumes so the responsibility is written down, not assumed. The packaging dielines verification checklist walks the file structure, dimension checks, and handoff items both routes must pass.
What not to do: pull an unverified template from a template library and send it as final. Free dieline templates are useful as references for structure families, but a template is not your dimensions, your board, or your grain plan. A template that is 2 mm off your product size consumes a sample round discovering that.
Whichever route you take, the handoff input set is the same six items:
| المدخل | Why the supplier needs it |
|---|---|
| Product outer dimensions at the largest point | Drives every panel dimension and the clearance decision |
| Product weight and orientation | Board caliper, grain direction, and which dimension stands as height |
| Structure family or reference | Binds the quote to one dieline instead of three interpretations |
| Quantity per size | MOQ basis and production planning (project MOQ is 200 pcs per size) |
| Board and finish direction | Crease quality, glue adhesion, and the finish-safe glue area |
| Regulatory or barcode placement | Safety-zone planning before artwork, not after |
Send the six as one set and the returned dieline is a proposal you can approve; send them across three emails and the returned dieline is a first draft of the questions.
Next action: decide the route in writing and put the confirmed dieline version number into the quotation record.
Common Dieline Mistakes That Delay Production
These are the recurring dieline failures that consume sample rounds and move bulk dates. Each one has a handoff-stage fix, which is cheaper than the production-stage discovery.
| Mistake | What happens in production | Handoff-stage fix |
|---|---|---|
| Artwork placed before structure lock | Every structural correction redraws the art and restarts proofing | Approve and date the dieline before the artwork session |
| Bleed missing or under-spec | White slivers at cut edges; reprint or edge-trim debate | Confirm 3–5 mm bleed on all edge-touching art |
| Critical content inside the cut/fold risk band | Logos shaved, barcodes bent across creases | Move critical elements into the stated safety zone |
| Grain direction unspecified or contradicted | Cracked creases, bowed panels, gluing jams on coated stock | State grain on the dieline and match it to the fold plan |
| Dimension order confusion (L×W×H read in the wrong sequence) | The sample is built to a different box than the buyer imagined | Compare dieline dimensions to RFQ numbers in the supplier’s stated order |
| Unresolved score line where a cut was expected | The carton opens wrong or the flap tears | Distinguish cut vs crease vs perforation per line, by layer color and name |
| Glue tab crossing varnish/foil | Glue does not adhere; cartons pop open in transit | Keep glue areas free of finishes; confirm width |
| Template reused with old dimensions | A sample round is spent discovering the size error | Verify dieline dimensions against product fit target, not template habit |
Each row is a verification question you can put to the file before handoff: “is this stated, named, and versioned?” The deep checklist for the full file set lives in the packaging dielines verification checklist, and the sampling-stage consequences are documented in the dieline handoff failure list.
Three of the eight deserve their own paragraph, because they are the ones that reach bulk.
Artwork before structure lock is expensive precisely because it feels productive: the design looks finished, the team reviews the design, and the approval momentum carries it toward sampling — on a dieline that is about to change. When the structure then moves, the redraw is real cost and the proofing calendar slips with it. The fix is a rule, not a reminder: no artwork session until the dieline carries an approval date.
The silent grain decision happens at imposition — the moment someone rotates your panels onto the printing sheet. Rotated 90° against the fiber, a coated carton can crack on every fold, and nothing in the artwork review flags it because the defect is material, not graphic. State the grain direction on the dieline and have it confirmed with the fold plan; the grain direction guide explains the mechanics.
Dimension order confusion survives every internal review because each side is sure of its own convention. Write the dimensions in the supplier’s stated order next to the dieline callouts and compare digit by digit. “90 × 50 × 130” and “50 × 90 × 130” contain the same three numbers and describe two different boxes; a sample round is the only teacher if the order went unchecked.
Next action: score your current dieline against the eight rows. Every “no” is a schedule risk you can still remove for free.
From Approved Dieline to Sample to Bulk
Once the dieline is approved and versioned, the production chain has three confirmed checkpoints:
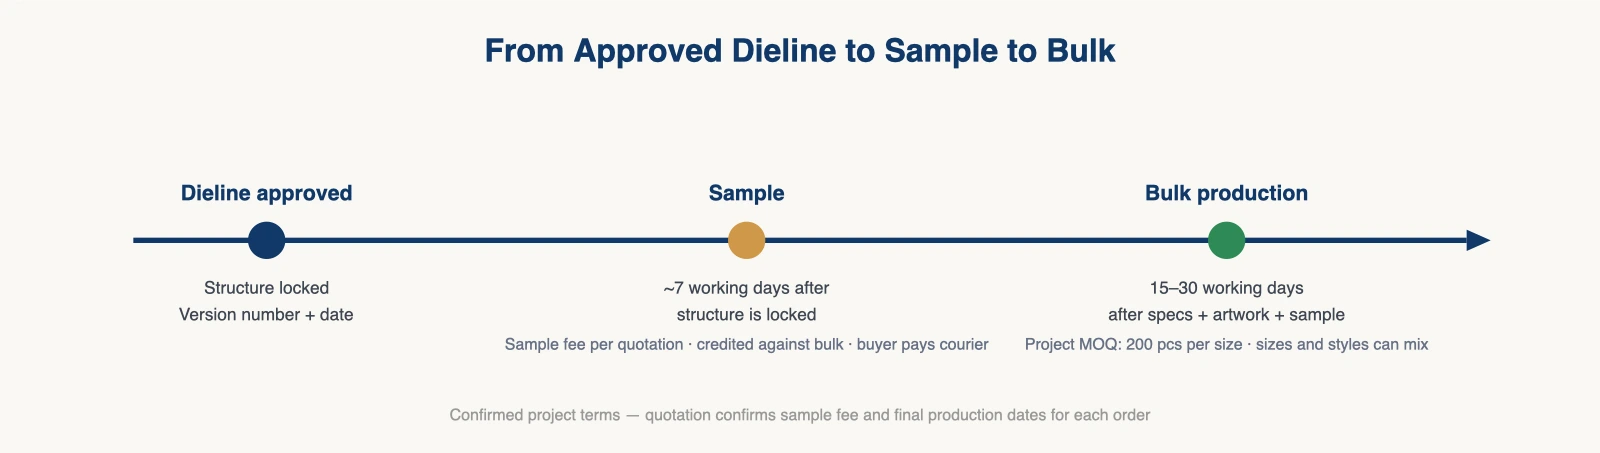
Sample — about 7 working days after the structure is locked. The sample answers structure and finish questions on real board: fit, fold force, print placement, closure action. Approve it against the dieline, not against memory — the sample that “looks right” but differs from the dieline is a new dieline, not an approval.
Bulk — 15–30 working days for standard production. The window starts from confirmed specs, artwork, and sample requirements. Dieline changes after this point are not edits; they are new production assumptions with new dates.
Quantity — the project-level MOQ is 200 pcs per size for each style. One order can mix sizes and styles, each at its minimum. The sample fee depends on structure and finish, is confirmed in the quotation, and is credited against the bulk order; the buyer pays the courier.
The sample approval stage has its own checklist of physical checks — panel squareness, score quality, glue hold — which the structural design sample checks walk through element by element.
Reorders are where dieline version control pays its rent. Six months after launch, the file that survives is the one named in the purchase order — and if the reorder picks up an old template or an unversioned export, the reorder sample round re-discovers every mistake the first run already paid for.
Keep three things together in one record: the approved dieline version (number and date), the sample that was approved against it, and the bulk order that shipped against both. A reorder then becomes a one-line confirmation — “same dieline, version 3, same board” — instead of a fresh engineering project. When the reorder sample arrives, the structural design sample checks are still the physical inspection list to walk before confirming the run.
Next action: put the three checkpoints and their dates into your launch plan with the dieline version number attached to each — and create the reorder record at the same time, while the version number is still fresh.
Dieline Packaging FAQ: Common Buyer Questions
What file format should my dieline be?
Vector formats with named layers — AI or PDF/X with the cut/crease/bleed structure preserved as separate named strokes, each on its own layer with a stated color convention (commonly black for cut, blue or dashed for crease, magenta for perforation). A flattened image or a raster mockup is a picture of a dieline, not a dieline; the die room needs the line data to cut tooling. If your designer works in a different tool, ask for the exported PDF with layers intact and check that each line type survives as a separate object before handoff.
Can you make a dieline from my product dimensions?
Yes — send product size, weight, orientation, clearance, and quantity, and the proposed dieline comes back for your approval alongside the quote assumptions. The dimensions that matter are the product’s outer dimensions at its largest point, plus any clearance the product needs so it does not scuff the printed walls, plus a note on orientation (which dimension is the height the box stands on). Confirm in the quotation whether the structural drafting sits with your designer or with the factory for your order — and confirm it before artwork begins, because the answer changes who redraws when a dimension moves.
Who owns the dieline file after production?
Ownership is a quotation term, not an industry default. Ask before sampling, and record the answer with the approved dieline version so reorder files are not a negotiation.
What is the difference between a dieline and artwork?
The dieline is geometry: cut, crease, panels, bleed structure. Artwork is the printed content positioned on that geometry. They are separate layers with separate approval owners — structure owned with production, art owned with your brand.
How many revisions does a dieline need before sampling?
As many as the dimensions need, and none after they lock. The expensive pattern is a dieline changing during artwork or after sampling; the cheap pattern is dimension verification and grain/finish confirmation at handoff, then a frozen version number.
Get a Dieline-Ready Quote
A dieline-ready quote needs four inputs: product dimensions or an existing dieline file, quantity per size, board preference, and print and finish direction. Send those to the custom folding cartons page and the quote comes back with the dieline assumptions stated — structure family, board caliper, glue area — so sample and bulk dates rest on a locked drawing instead of a guess.
If the structure is still open, the folding carton structure overview walks the choice before the dieline stage, and the supplier comparison sheet keeps every quote on the same basis while you decide.
Send your specs to get a same-basis quote from our Xiamen factory.
اسأل سؤالاً عن التغليف